The fields of the Jump table are used to indicate branching (or skipping) conditions when the default next question may not be the successive question in the survey logic. If the response provided by the respondent (or response resulting from an internal function calculation) meets a certain condition, various, conditional branching patterns may take place. The designer uses these jump fields to set up the conditional jump patterns.
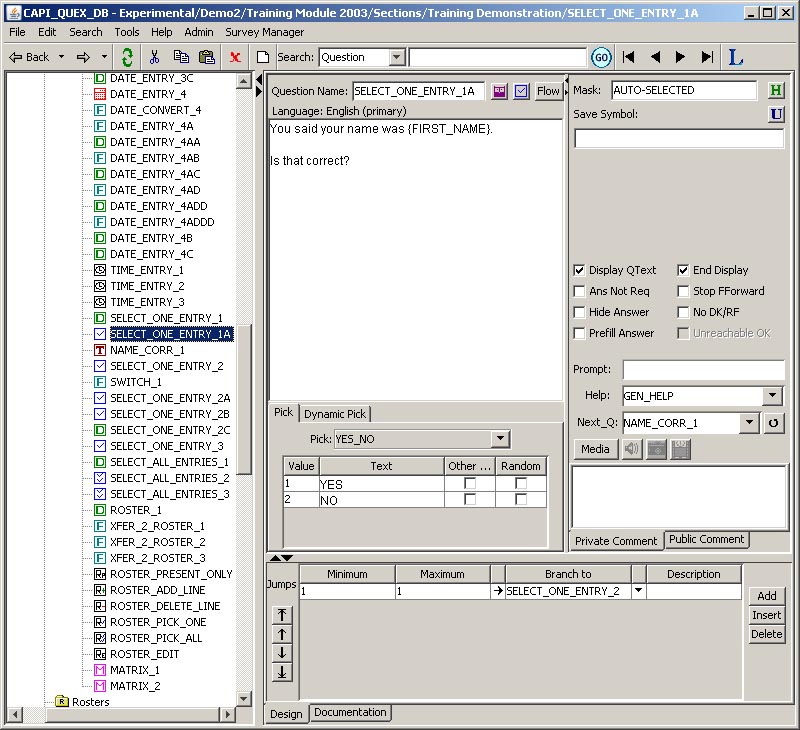
The figure below shows a sample image of the jump table and its fields. This sample image is taken from a Select One question type. The jump table and its fields may also occur in Text Entry, Numeric Entry, Slider Entry, Internal Function and Roster Pick One question types and will be displayed at the bottom of the Design screen for these six question types. If there are no branching conditions used by the particular question, an empty jump table will be shown. Jump fields are not relevant for other question types, so they are not displayed in the design screen for those types.
In the jump table image above, each row specifies a jump condition. A jump condition has a Minimum value and a Maximum value. When a jump condition is satisfied, the survey will branch to the question indicated by name in the Branch To column. The designer can put his/her comment in the Description column. The jump conditions are checked one by one from the top, hence, the jump sequence is important. The jump condition on the top is checked first, then the second, the third, etc., until a satisfied jump condition is found. If none of the jump conditions is satisfied, then the survey will go to the default next question, indicated in the Next_Q field of the Design screen.
The Minimum and Maximum values in the jump field cannot be expressed dynamically. That is to say, symbols may not be used, just numeric values.
On the left of the jump table there are four Arrow buttons. These buttons allows users to change the sequence of the jump conditions. To change a jump condition's sequence, a component field in the condition must be selected by highlighting it (place the cursor in one of its fields and single click). This jump condition may now be moved up or down by using one of the buttons. From top to bottom, the buttons represent: 'move to top', 'move up one row', 'move down one row', 'move to bottom'.
On the right side of the jump table, there are three buttons -- Add: to add a jump condition at the bottom of the list; Insert: to insert a jump condition above a selected (or highlighted) row; and Delete: to delete the selected row(s).
Multiple rows may be selected for deletion.